Service Grid
Introduction
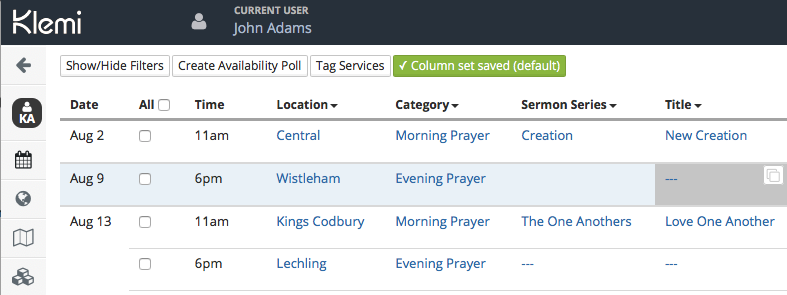
The Service Grid is a representation of the key information about services in table format. It allows administrators and service planners to get a quick and easier overview of upcoming services and their sermon series, sermon title, reading(s), the responsibilities (or roles) assigned for it, information about absences and space to add notes. Some people would call it a ‘rota’ ;-). If you’re overall responsible for Klemi at your church you’ll be helped by grasping the general principles of the Service Manager before you read this. If not – stay here!
What it does
The Service Grid is the starting point for a number of key administrative tasks for services.
- Viewing services. The Service Grid gives a date specific view of upcoming services
- Filtering Services If you can’t see services far enough in advance on the grid, or if you want to select only those services that occur at a particular time, hit “show/hide filters”, change the dates and times and the page will automatically repopulate.
- Sharing Service Information. Hit “share’ and you’ll also get a handy public link show up which gives you a publicly accessible, non-editable view with exactly the same filter that you’re looking at. This is great for sharing with volunteers in the congregation who need to know the information but don’t need to edit it, particularly if you don’t want to.
- Link to Personalised calendars for those who have roles (html and ical) via the ‘share’ button
- Creation of availability polls (a bit like doodle.com)
- select the services for which you would like to collect availability
- click “create availability poll” and follow the instructions
- Assign roles for a service
- See the basics in our instructional video:
- If you have some people who appear very often and it would help to show them in abbreviated form, go to their member record and add it to the initials field. This should give you a cleaner view, especially when you’ve got a lot of columns. Note that when entering names you should typical choose the individual’s name in the drop down. This is best found by entering their full name and then selecting the appropriate entry. If the name you choose has “NOT REGISTERED” next to it, that means this person isn’t on the system – i.e. klemi doesn’t “know” them – they’ don’t correspond to an existing member record. Sometimes that is necessary (e.g. an outside speaker who is only there on one occasion) but generally users should make sure they select an individual from the drop down without NOT REGISTERED next to their name, otherwise other parts of the system will not work as well as they could, for example, that service won’t turn up on that individuals calendar page, or on their online calendar.
- Customise Columns – Custom columns can be chosen and re-ordered using the drop down menu under each column heading. You can add extra roles (with either single or multiple member assignment), a notes field, a google calendar, a category field, a church calendar or a custom text field.
- Tagging – a great way of grouping your services in a robust way. You might have a 9:30 service that happens every week, except sometimes it happens at 9, but when you’re looking at the schedule for just that service (perhaps you’re wanting to get a term’s overview), it’s important that you can see that unusually timed service alongside the others. By grouping services using tags you’re can be sure that you aren’t missing any
- Creating Multiple Service Grids (aka ‘rotas’) If you’re confident with the service grid and it’s working for you, have you thought about adding further grids to your klemi installation? More here